Five Ways
Subscribe to my newsletter and get a free story!
Share this:

Notes From Michael Stackpole's "How To Write a Novel in 21 Days"

Michael Stackpole
Michael Stackpole
These are my notes from the presentation at MidSouthCon 30, 2012m which was great. I suggest taking it from Michael rather than using these notes, which are a poor substitute at best. You can find the CD on his website. That said, here are the notes. I should say that they’re less about how to write a novel in 21 days than how to plan a novel in 21 days through a series of exercises intended to increase knowledge of character, world, and plot.

Overall
Writing is a skill – like any other skill, you get better and more efficient at it. Successful writers write steadily. Don’t worry about speed. Think of every word written down as one closer to your goal.

Writing is also a cyclical process. Ideas are generated and get fed back in. Don’t sweat the messiness as this process is underway because readers will never see anything but the final results. No first draft will be perfect.

Day One
Describe one character with 5-7 single sentences that each describe him/her/it in a specific area, such as their love life, education, current situation, occupation, hobbies, problems, etc.

Day Two
For each of your sentences, write two more sentences that each on it, creating a paragraph about each area of description.

Day Three
Write a single sentence about each life area that runs counter to the previous sentiment. For example, a paragraph about how the character really wants children might have a sentence about how they’re sterile. A paragraph about how they’re happily married might merit a sentence about feeling attracted to the new office manager at work.

Day Four
Write two more sentences expanding on each of the negative sentences from the previous day. You should end up with five (Michael said overachievers can go as high as seven) life areas with two paragraphs describing each. The discrepancy between the two paragraphs creates conflict, which is needed to create story.

Day Five
Repeat Days 1-4 for a second character, who doesn’t have to be involved with the first. They should be characters that interact in a story but are not protagonist and antagonist.

Day Six
For each character, think about short and long term life goals. Write down two short and one long for the character. Bonus points if some goals conflict. This part provides insight plus other stuff for the character to do.

Day Seven
Look at both characters and chart out the obstacles and fears in their life that keeps them from attaining their goals. These are problems you will have to engineer a way past.

Day Eight
Repeat steps 1-4, 6, & 7 for a third character. This lets you think about the characters in terms of a triad, rather than a pair. Interactions between pairs are predictable and low energy, so the new possibilities created by a third character help keep a story high energy.

Day Nine
This day’s devoted to developing a character’s voice. You want each character to have a unique voice. The more you know about a character, the easier it is to write, because some decisions have been made already. Write a letter (no minimum or maximum length) from one character to another doing one of the following: a) asking for help, b) warning them about something, c) apologizing, or 4) explaining something. The text of the note should demonstrate vulnerability on the part of the character writing it. Once it’s written, think about the physical appearance it will take when delivered to another character, which will provide additional insight.

Day Ten
Write a scene consisting of dialogue only (with no attributions) which is a conversation between the letter writer and its recipient. Because there are no attributions, you will need to make sure each character’s voice is differentiated enough that you can tell who’s speaking. Ways to do so: establish level of education, use jargon from their background or job, use verbal tics, etc. Make as long as appropriate, but should prbably be at least a page.

Day Eleven
Revisit the scene where the previous day’s dialogue takes place and write it from the point of view of a third character who can see what the people speaking to each other are doing, but cannot hear what they are doing. The intent is to achieve better-nuanced dialogue, and to move towards showing, rather than tellings, which makes a reader think for themself, thus engaging them, rather than spoon-feeding them facts.

Day Twelve
Now we’re starting on world and setting. Think about what roots these characters in the world? What is in the character is a reflection of the world they grew up in. You may end up adjusting the original profiles at this point. That’s okay. Do this for each character.

Day Thirteen
Think about how the world helps or hinders each character’s achievement of their goals. Is this a friendly nurturing world or a harsh one? The world’s tone determines how hard characters will have to work to achieve their goals.

Day Fourteen
Ask what happens to the world if the characters succeed in attaining their life goals? How would it change? Ask the same question about what happens if they fail. This tells you how strongly the world will resist what they’re doing. Ask – how logical is it for the world to notice what the character is doing and push back?

Day Fifteen
Write a brief scene for each character. Pick one of the following: 1) describe that character’s sanctuary/happy place/safe haven. Where are they most at home? Describe through the character’s eyes. Do this for each character. 2) Take a place where all the characters will be at the same time. Look at the details of the surrounging and see what each of them think of it. Then describe the place from all three characters’ points of view.

Day Sixteen
Now for structure and plotting, which is the toughest part. Write the back cover blurb for the novel (six sentences at most) and the one line description. This will help you figure out the core conflicts, which are the ones that should appear in this.

Day Seventeen
This is the toughest day. For every problem, understand the conflict and its resolution. Figure out the scenes necessary to show each. Most (many) will require the following: 1) a scene that shows there is a problem, which the character may or may not be aware of, 2) a scene that shows where the character realizes there is a problem, 3) a scene that gives your character a reason to want to solve that problem, 4) a scene or series of scenes showing the development of skills and resources necessary to solve the problem, 5) scene that shows the success of failure of this effort. Your’re creating 6-12 scenes for each problem and accumulating an inventory of scenes.

Day Eighteen
Now it’s time to arrange those scenes against the world timeline. Think of the world as another character and go through your scenes looking to see which create an event that would be noticed by the outside world. These events are fixed points in time. After you’ve done this for all the characters, look to see where events are taking place at the same time and might be combined in a single scene. Think of events as though you have to build sets for each and, much as they do in TV, be efficient and shoot as much footage in each point as you can, rather than having to redescribe and re-set the scene somewhere else.

Day Nineteen
Look at events and scenes and decide whether or not you need to add any scenes where characters react to events. If so, does the new scene create a new event that other characters might need to react to? You may have to go through several iterations of the Day 17-18-19 cycle, because this is how you pull the nobel together and make it live outside the characters.

Day Twenty
Each character should have an inventory of a dozen or so scenes that they’re in. Slot scenes into their chronological order, and bingo, you’ve generated an outline. An outline is to a novel as a map is to a really good road trip – as you write, you will discover new things to explore.

Day Twenty-one
Start writing! Don’t edit as you go, make a note if there’s a needed change, and save that for the editing process.

There you go!

One Response

Leave a Reply

Your email address will not be published. Required fields are marked *

Get Fiction in Your Mailbox Each Month

Want access to a lively community of writers and readers, free writing classes, co-working sessions, special speakers, weekly writing games, random pictures and MORE for as little as $2? Check out Cat’s Patreon campaign.

Want to get some new fiction? Support my Patreon campaign.


"(On the writing F&SF workshop) Wanted to crow and say thanks: the first story I wrote after taking your class was my very first sale. Coincidence? nah….thanks so much."

~K. Richardson

You may also like...

Retreat, Day 8 (Stuff about Plotting Novels)

Yesterday I got very little writing done, and instead worked on plotting. Ugh. I’ve reached that stage of the manuscript where I feel like I’m herding cats, and it seemed like time to make things make more sense.

Major Ingredients for Plotting

In starting, I had the following:

  • a strong idea of each major character’s story arc
  • the first book, which has some chronological overlap with volume 2
  • a lot of scenes in various stages — some complete, some partial, some only notes, all contained in Scrivener
  • a somewhat ragged and incomplete synopsis

And some things that made the process of plotting more complicated:

  • Complication #1 to plotting: multiple POVs, including some episodes that overlap in time. Arranging these is much harder than you would think.
  • Complication #2 to plotting: a couple of readers complained that the 1st book started slow. I wanted this one to grab and go.
  • Complication #3 to plotting: a feeling that the POVs must be balanced to some extent.

Figuring Out the Overall Structure: the Sketchbook Method
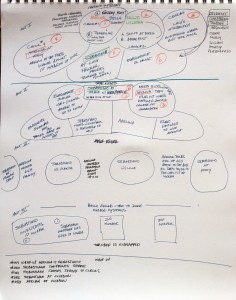
So I printed out the synopsis and got out my big sketchpad. I wrote the three chronological points that were most important from the first book on the page, roughly where I thought they’d fall in the book: one at the very beginning, one about a quarter way through, and one about half the way through.

At first I divided the page into three sections for three acts, but by the time I was done, there were five sections total. I think of them as “acts” in that I want them to begin at an interesting point, have the right mix of scenes from the different POVs, and finish in a way that feels like a mini-ending, a chance to think about what’s gone before and to prepare for what’s coming up.

Overall Outline
Overall Outline

As you can see, that first page eventually ended up looking like a bit of a mess (and right now the image keeps showing up sideways, for some inexplicable reason that I cannot figure out at the moment), but it let me figure out where some things had to happen and realize that I had to nail down where a particular character from the first book is at all times.

I started working with colored pencils in order to track the different main characters, but that fell away as I began arranging what I already had. But it’s handy to be able to see the story from a high altitude, the 10,000 foot view, so to speak, particularly in terms of making the story make sense. Because while the writer can — and probably should deviate from a straightforward chronology for anything but the least complicated of stories — every time they do it, they place a demand on the reader to jump the hurdle and bounce along into the next scene with them.

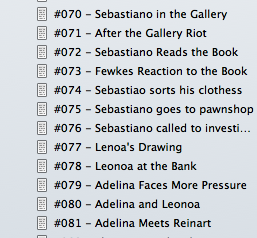
As far as what’s been written, I have it in Scrivener, that most indispensable of tools. My process lately has been to work on individual scenes in nothing at all like chronological order, but more in the order of ones that really will be fun to write first (this approach has the drawback of inevitably arriving at a final sludge of scenes you didn’t want to write, but you will find at that point that at least half of them are actually not necessary.) So I began splitting up the pieces that were actually multiple scenes crammed in one document because they’d all been part of the same writing sprint, and numbering each one.

Screenshot from Scrivener
Some of the numbered scenes

Breaking Things Down: Individual Acts

Taking my big sheet, I created a new one for each of the first four sections, and with each, tried to figure out the structure as far as the alternating voices went. I realized that what I had were two main points of view (Adelina and Sebastiano) and then a third one consisting of a brother and a sister (Eloquence and Obedience).

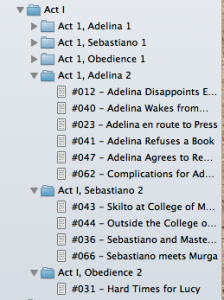
As I went through the manuscript, I began to sort the scenes into order, creating folders for the different POVs. While the scenes may not happen in the exact order they do in the folder, this gets me started putting scenes that will be close together into a single chunk.

Dividing acts into POV chunks
And the main reason I want to have chunks like that, with multiple scenes from a single POV, rather than alternating POV every time I switch scenes, is that every time you move from one head to another, you bump the reader out of the story a little and remind them that they are reading, which is a cardinal sin.

Here are the individual act pages. As you can see, they’re messy and inexact, but they’re helping me sort out what goes where in a way that will then let me compile what I have into a document and start looking for the major holes, since filling them in is the next step.

Once I have those holes filled in, I’ll begin wrestling each chunk into a smooth form, and imposing a story arc of one kind or another on it.

Someone asked how I use Tarot cards in plotting. I use them as a way to figure out the major points and considerations for a scene or a chunk, by doing a simple Celtic Cross reading for the main character in that scene. If you’re not familiar with Tarot cards and that configuration for reading them, here’s better information on the spread, and I’ll blog sometime in the next couple days with a sample reading for a scene (but right now I should put in some actual ficiton wordcount).

Some SFWA and Class-related Stuff
In SFWA news, Todd Vandemark has put up the 1st of the videos he filmed at this year’s Nebulas, Steven Gould and I talking about joining SFWA. There will be new content on the channel released on a regular basis throughout the coming year, and I’m pleased to see that idea finally taking solid form.

Maggie Hogarth is onboard as the new Vice President and already hard at work. Look for some cool stuff coming up over the new year. 🙂

Finally, I’ve been doing some teaching from retreat and finding out that the wireless works fine. The Writing Your Way Into Your Novel class was terrific and gave me lots of ideas. This Saturday the 6 week Writing F&SF Stories starts. I’ve still got slots in that (as well as most of the other classes) and would be willing to talk about sliding scale or barter if you’re interested. If you’re interested, check out the list of classes here.

...

The Writer's Toolbox: What Goes In It?

Decorative imageA metaphor that I was exposed to at Clarion West (now nearly a decade ago) still works beautifully for me, and it’s one I use when teaching: the idea of the writer’s toolbox.

In my mind’s eye, it’s a big red metal tool chest, small enough to be carried around, large enough that you wouldn’t want to HAVE to carry it around all the time. Inside, drawers lift out to reveal neatly packed devices and tools, each in their own padded slot.

There’s a blade capable of lopping off awkward paragraphs, and sharper, tinier words designed for work at the sentence level, trimming beginnings till they catch a reader like a fish hook and pull them into the story. There’s a box of punctuation marks, with a special slot for the semicolons. There’s the intricate device of an unreliable narrator, calculated to wobble like a gyroscope yet still remain true to the story’s course. There’s a set of filters, each one a specific point of view, each letting you cast a section in a different light. And a layer of ornamental gadgetry: epigraphs and scraps of poetry. And a valuable gimlet, capable of drilling down to a character’s motivation: the question, “What does s/he WANT?”

Even this metaphor’s a device (and if you want to know more about metaphor, I can do no better than point you at Chuck Wendig’s excellent piece, in which he’s said everything I’d say and then quite a bit more).

I’ve been thinking about it in going over notes for the class on Literary Techniques in Genre Fiction, because my aim in that is two-fold: to give students not just a whole bunch of new tools, but some sense of when to use them and a chance to experiment with them. Because a device shouldn’t be separate from a story, but an integral part of it, something that adds more to it than just a chance to see the writer being clever.

To push the metaphor a little further, stories are like furniture, only without the useful part, like being able to sit on them. You want them to feel like a single piece, not a table with some drawers and ornamental hinges glued on it. In the class, I try to introduce new tools students may not have (consciously) worked with before, including defamiliarization, hyperbole, synthesia, and a lot of other fancy words. And I also try to expand a drawer they’ve already got partially filled: sources of creative inspiration.

Enjoy this writing advice and want more content like it? Check out the classes Cat gives via the Rambo Academy for Wayward Writers, which offers both on-demand and live online writing classes for fantasy and science fiction writers from Cat and other authors, including Ann Leckie, Seanan McGuire, Fran Wilde and other talents! All classes include three free slots.

Prefer to opt for weekly interaction, advice, opportunities to ask questions, and access to the Chez Rambo Discord community and critique group? Check out Cat’s Patreon. Or sample her writing here.

...

Skip to content